These days virtually everyone uses some kind of device that allows them to capture the beauty of the real world, and make a digital copy out of it. These images are usually stored in file storage like hard disk drives, SSD drives, and micro SD cards. They used to be somewhat expensive, but the high demand for file storage caused their prices to plunge. Even though the image size used to be a problem for certain device manufacturers, it’s no longer a concern for them as file storage is dirt cheap.
Image optimization is still useful in certain circumstances, as it allows people to save money and energy in the long term. This article teaches a couple of tricks to drive the size of images down without eliminating their quality.
Solution 1: Use Right Image Format
There are many image formats out there, and each one is designed to fulfil the requirements of a different set of users. This is why it is important to pick the right image format for the job. Picking the right image format not only saves the storage space, but also time, and money in the long term. Some popular image formats are PNG, JPEG, BMP, and WebP. The PNG image format is used to show transparency of images, the JPEG image format is used for general purpose applications, the BMP format is still used when images are sent for editing, and finally, the WebP format is used in web pages to improve the page load time. This solution teaches how to convert an image to a different format with ease.
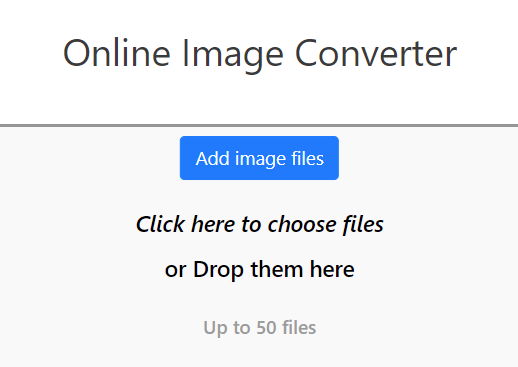
1.Navigate to the following link https://online-converting.com/image/
2. Drag and drop all the images which you want to convert to the area titled Online Image Converter.
3. Next, you will have to adjust the settings. If you’re not sure which settings to apply, leave everything as it is, and only pick the Image format you want to convert to. The default settings are sufficient for virtually everyone.

4. Once the images have been converted and downloaded via the given link, you can safely remove them from the server.

Solution 2: Adjust the Settings While Converting Images
The metadata of images can be changed when converting images from one format to the other. This helps further optimize images. Metadata such as type, quality, image size, compression type, compression method can be edited through applications that convert them. This solution uses XnConvert to change the metadata settings. Settings for the particular image format are located in the Format group in the Output tab in XnConvert.
When Converting Images to PNG
For PNG images, Interlaced, and Compression Level options can be used.
Interlaced — Interlaced technology allows the user to view the image before downloading it. It is quite useful when the images are used in web pages, as it allows the user to view the whole image while downloading it in the background. This technology is kind of the same as buffering for videos.
Compression Level – The compression level option specifies how compressed the image will be. Highly compressed images take some time to decode themselves, whereas mildly compressed images take a significant amount of space in the file storage, and therefore it’s important to pick the right balance for the compression level.
When Converting Images to WebP
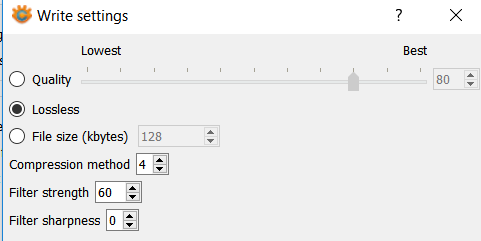
WebP is an image format developed by Google to be used primarily in web pages to speed up page load time. It is used in phones and desktops also, as modern applications support it. In WebP the important metadata is quality, compression type, compression method in terms of the file size.
Quality – Quality specifies how much data an image contains. An image consists of a series of pixels. The higher the density of an image, the higher it’s quality. Reducing the quality of an image decreases its pixel density, so a balance should be maintained between size and quality. The recommended quality for a regular image is 80%.
Lossless – This option depicts the compression type of image. There are primarily two types of compression types, lossless, and lossy. Lossless keeps the quality of an image intact while reducing its size, but it can increase the decoding time of an image, which increases the image load time. Lossy type decreases the pixel density of an image, thereby decreasing the quality. It is always recommended to use the lossless compression type except when images have to be viewed over a network.
Compression Method – The compression method is the same as the compression level option described above. Increasing the compression method decreases the image’s size but as a result, the decoding time of the image increases. Decoding time determines how quickly the image loads on the screen. The default value is 4.
When Converting Images to JPEG
JPEG is a popular general-purpose image format and has been used in web pages due to its smaller size, and high compatibility with many web browsers.
Quality stands for everything. The higher the value, the higher the quality of the image, but high-quality images take a significant amount of space in the file storage. It is recommended to leave the quality at 80% as it’s the right balance between quality and file size.
The progressive option specifies how the image is encoded. Turning it causes the image to load like a series of waves until the full image loads. This is useful when the image is used on a web page as it improves the loading time of the page.
Huffman table optimization is an image optimization technique to optimize images to reduce their size, but it potentially makes the image incompatible with certain decoders, and therefore it is better to turn it off, especially when the image is used with older devices.


