File Explorer is the default file management tool that allows navigating through the file system in Windows with ease. The simplicity of File Explorer helps novice individuals to easily get acquainted with the Windows operating system. File Explorer used to be known as Windows Explorer, but it was renamed File Explorer with the rollout of Windows 8 with an added visual and functional overhaul to improve the user experience.
Identify and Group Similar Looking Photos
Use PictureEcho’s intelligent algorithm to clean up photos collection and save disk space.
This article shows 15 ways how File Explorer can be used to manage photos with ease. Before you proceed, please ensure Windows is up-to-date as some of the solutions might not be available in previous versions of Windows.
Solution 1: Quick View Access
Windows has a lot of special directories, and one of them is Quick access. This feature allows users to navigate to the desired folder with a single click. By default, there are only a couple of folders pinned in this section, but more can be easily added.
-
- Open up the location where the target folder is located.
-
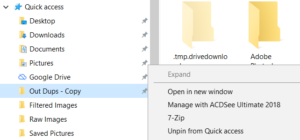
- Right-click on the desired folder, and click on Pin to Quick access.
- That folder will now be visible in the Quick access section in the navigation pane.
- If you want to remove a folder from the Quick access section, right-click it and select Unpin from Quick access.
Removing a folder from Quick access
Solution 2: Use Navigation Pane
The navigation pane can be used to access various folders in the file system with ease. Special directories like Quick access, Cloud drives like OneDrive, Google Drive, Dropbox, and Network drives are listed in the root folder. The rest of the directories, like partitions, are listed under the This PC directory. The Quick access section can be used to pin favourite folders to access them quickly. The following steps demonstrate how to make the navigation pane visible in File Explorer.
-
- Click on the View button in File Explorer.
- Click the Navigation pane, and select the Navigation pane option as seen in the following screenshot.
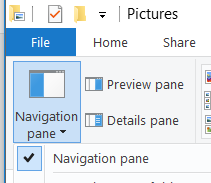
Enabling the Navigation pane
Solution 3: Show Extension of Known Files
Finding the extension of a photo at a glance is quite helpful in certain instances. File extensions are not shown by default. The following steps describe how to adjust the settings so the extensions are shown.
-
- Click the View button in the File Explorer and then click Options.
-
- In the Folder Options window that opens up, switch to the View tab.
-
- In the Advanced settings section, unselect the checkbox for Hide extensions for known file types.
- Click OK to save the changes.
Solution 4: Share Images
Image sharing is one of the most frequently used features in mobile operating systems. It’s barely used in desktop computers as it’s pretty easy to drag and drop images to any application with the mouse pointer, but if someone gets used to the traditional sharing approach, then this particular feature might come in handy. Windows store apps for the moment.
-
- Select the images you want to share.
- Click the Share tab, and then click the Share button.
- From the window that opens up, select either the people or the app where the images will be shared.
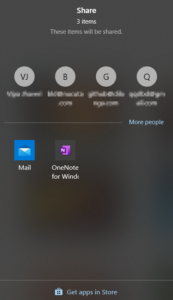
Selecting the image recipients
Solution 5: Preview Images
Images can be previewed in File Explorer without opening them. The Preview pane is very helpful, especially when you need to take a quick glance at a big number of images.
-
- Click the View tab, and then click on the Preview pane option to turn on the image preview.

Turning on the Preview pane
- Click the View tab, and then click on the Preview pane option to turn on the image preview.
- Click on any image to preview it on the right-side pane in File Explorer.
Solution 6: Preview Metadata of Images
Metadata provides information about the image attributes, such as modified date, created date and resolution. Just like the previous solution, the metadata of images can be easily previewed.
-
- Click the View tab, and then click on the Details pane to activate the image metadata preview feature.
- Click on any image to preview its metadata on the right side pane in File Explorer.
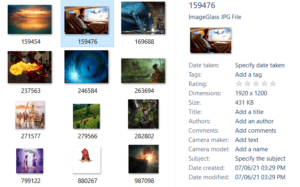
Selecting an image to view its metadata
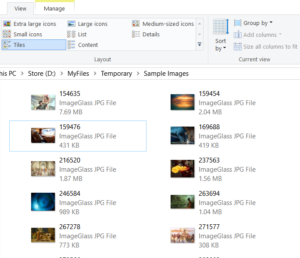
Solution 7: Change the Image Thumbnail Size
By default, File Explorer previews the images on its main body without requiring any additional pane. The image thumbnail in the main body can be adjusted to have a better look at multiple photos at once.
-
- Click the View tab, and then click an option in the Layout area to adjust the preview size of images.
- Observe the changes in the File Explorer as you select an option.
Solution 8: Group Images
Images can be grouped by the Details column to organize them in the current folder. By default, only a handful of details are available in the Group menu. You can easily add more options to group images by location, the camera lens etc.
-
- Click the small arrow pointing downwards at the top-right side of any folder.
-
- Click on Group by, and select an option from the list.

Choosing to group icons
- Click on Group by, and select an option from the list.
-
- You can add more options by clicking on Choose columns in the same menu. This opens the Choose Details window which can be used to select a whole range of options.

- You can add more options by clicking on Choose columns in the same menu. This opens the Choose Details window which can be used to select a whole range of options.
- Once you click an option, the images will be very quickly grouped in the File Explorer.

Image grouping applied
Solution 9: Sort Images
Images can also be sorted to better organize them. By default, only a handful of details are available in the Sort menu, but more can be added as explained in the previous solution.
-
- Click the Sort by button and select an option from the list.

- Click the Sort by button and select an option from the list.
- You can click on Choose columns to add more options for image sorting.
Solution 10: Rotate Images
Rotating images is quite helpful if they were taken upside-down. Without any external software, many images can easily be rotated at once right through File Explorer.
-
- Click the Manage tab in File Explorer.
- Select the images, and click either Rotate left or Rotate right from the menu to rotate them.
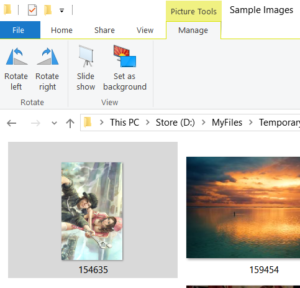
Rotating the selected image
Solution 11: Make a Slideshow
Making a slideshow requires some time as it requires a third-party application like Microsoft PowerPoint. File Explorer provides a minimized version of MS PowerPoint for creating a slideshow with ease.
-
- Click the Manage tab and then click the Slide show button.
- Some additional options are available by right-clicking on the slide.
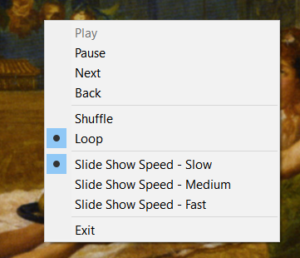
Additional options for the slideshow
Solution 12: Set Images as Background
Setting the desktop wallpaper on Windows 10 is very easy as File Explorer provides an option. It’s handy for individuals who don’t have an activated Windows version; otherwise, the wallpaper can’t be changed through the Personalize option.
-
- Click the Manage tab in File Explorer.
- Select an image, and select Set as background.
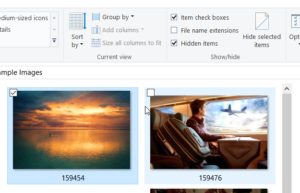
Solution 13: Item Check Boxes
The Item check box replaces the Ctrl + Left Mouse combination; therefore, using both the keyboard and mouse for selecting multiple images in the File Explorer is no longer needed.
-
- Click on the View tab and select the Item check boxes option.
- Locate the small checkbox on each image at the top-left corner to select it.
Solution 14: Share images via email
Images can easily be shared via an email in File Explorer with the Email option. This option might not work with some email applications; hence this guide uses Mozilla Thunderbird as the email client as it’s available for free.
-
- Click the Share tab and then select the images that have to be shared via email.
-
- Click the Email button as shown in the following screenshot.

- Click the Email button as shown in the following screenshot.
-
- The Attach Files dialog box lets users reduce the images’ resolution before adding them to the email. Reducing the resolution helps send the email faster as it takes less time to upload the email.

- The Attach Files dialog box lets users reduce the images’ resolution before adding them to the email. Reducing the resolution helps send the email faster as it takes less time to upload the email.
- Add the To address, and send the email via Mozilla Thunderbird.
Solution 15: Compress Images
Compressing images reduces the file size and allows users with lower bandwidth to share them via a messenger app or email. Clicking on the Zip option compresses the selected images and makes a Zip archive in the current folder.
-
- Click the Share tab in File Explorer.
-
- Select the images you want to compress.
- Click the Zip button to start compressing them.

