Cloud is the way forward. Cloud drives are increasingly becoming popular due to the vast range of benefits they provide. These drives saw the light of the day in the last decade and have since quickly become one of the most preferred modes of data storage for users of all hues across the globe.
Cloud drives have not just enabled users to create a backup of their data which can be used when the need arises, but they go way beyond that. A business personality can conveniently attend to their important business work while on the move, a professional photographer can easily store all their hard work online for no/little cost, all courtesy the cloud storage medium. And lastly, cloud drives such as OneDrive and Google Drive have also enabled office workers to simultaneously collaborate on a document to speed things up, and the same can be said about students working simultaneously preparing their college assignment while sitting in their home.
These (and many more) scenarios lead to the cloud being used on a more regular basis. This is most definitely bound to result in adverse issues sooner or later. As people make use of the cloud for more and more of their computing jobs, this results in them creating as well as storing their data on the cloud on a more frequent basis. We human beings have been very lazy in properly organizing our data since ever. This includes not naming files properly, saving the files in the right folder and so on. An average computer user would simply log on to a certain website, download the song/ video they want and that’s it.
Most of the times the song/video are named in a very weird manner by the websites that host them. No big deal, the reader might think. But when the person needs to listen to that particular song after a week, they simply can’t identify it from a gigantic mound of songs that are all named in a strange manner. They will always prefer to download the song rather than look for it by playing every single song until they find the one they were looking for. Now our readers must have started to get the heck of the problem that is brewing.
When this mess of duplicates starts to grow and is synced to the cloud, big trouble follows. The user either ends up wasting their free cloud storage on duplicates or even worse, pay for duplicates to happily sit on the cloud (if they’ve subscribed to a paid cloud service).
A similar scenario can lead to duplicate documents making their way to the cloud, and the results are again very troubling.
So what can be done? Surely enough no one would want to go around manually inspecting each and every single file to detect duplicates. Worry not, as there is a noble solution that does it all, with accurate results.
This web service is all you need to get rid of duplicate data from your cloud accounts. It is extremely efficient and performs the whole job with a perfect degree of accuracy. What’s even better is that the time it takes to load your cloud drive, scan your drive/selected folder(s) for duplicates and the final duplicate purge operation is all performed in an extremely fast manner.
For any user who might be worried about data safety and security, Cloud Duplicate Finder makes use of the official APIs of the concerned cloud service. Since these tools are provided by the developer themselves, they ensure there is no loophole in the security mechanism at all.
Currently, Cloud Duplicate Finder supports removing duplicate documents and songs (and all other file types) from OneDrive, Google Drive, Dropbox and Box, and our readers can expect to find more drives to be added in the future. Anyways, let’s now get right into the bottom of the duplicate documents and songs cleanup.
- Open up Cloud Duplicate Finder by clicking on this link.
- Click the Sign Up link in the header to navigate to the new account registration page. Enter in all the required details, agree to the Terms & Conditions and click Proceed.
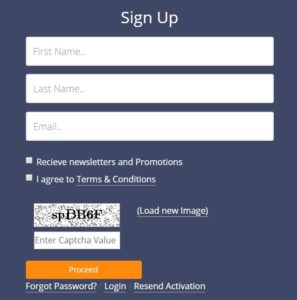
The Sign Up form
- You will receive an email (at the email you used for registering your Cloud Duplicate Finder account). Simply click the link in the email to validate the email address.
- Now the final step involves setting up a password. We recommend setting a strong password that contains a minimum of 10 characters, including upper and lower case alphabets, and does not give away a clue that can easily be attributed to you, e.g. your hometown, your surname, etc. Click Proceed once you’re done.

Setting the password
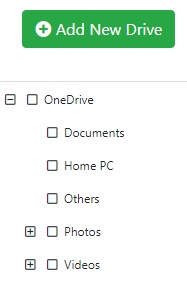
- You will be redirected to the scan area right away. Select the cloud service you want to scan and click the Add New Drive button on the left. We will be scanning OneDrive in this article to help you understand the whole procedure, with the steps for all the others drives being exactly the same.

- As mentioned earlier, the official API of Microsoft OneDrive will spring into action and process the credentials you enter. You will notice your OneDrive data populate the Cloud Duplicate Finder interface within moments, once the login process is successful.
- Select all the folders you want to scan, and then head to the next section that deals with file types.
- You can simply have the All Files option selected for the scan and proceed. Alternatively, you can click Custom Files and then select which file types you want to be scanned. In this case, we will select Documents and Music.
- Now select the Preview checkbox so that you can view the preview for an image file if the need arises. Finally, click Scan to launch the duplicate documents and songs scan.

Customizing the scan
- The scan will spring into action and will require you to be patient for a short period of time. You will get a pop up informing you of the scan results once the scan is over.
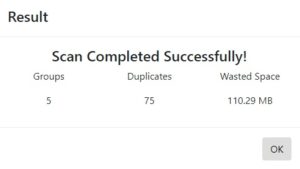
Scan results
- You will now notice the duplicates laid out in a list. You can click Next to navigate onto the next page that contains results, as Cloud Duplicate Finder is optimized to display 80 results per page.
- Now click the Select Duplicates button and decide if you want to retain the oldest file in each group or the newest.
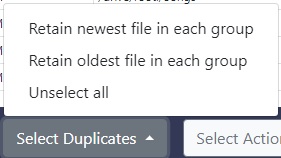
Select which file will be retained
- The final step is to click Select Action and then click Move to Recycle bin.

The final step in duplicate cleanup
- Click CONFIRM in the next prompt to greenlight the deletion.
- All the duplicates will now be deleted to the Recycle bin. However, please note that they are still occupying space in your OneDrive quota. To permanently get rid of them, open the Recycle bin in your OneDrive and click Empty recycle bin.
That’s it. Cloud Duplicate Finder performs a complicated looking job with an unmatchable degree of perfection. It is fast, sharp and uber-secure.
If you have a query in your mind, do visit the FAQs section to know more about Cloud Duplicate Finder. Have a good day!

