An external hard drive that is operated over a particular computer network (for example a local area network i.e LAN) is known as a network drive. If you work at a large office where there is a regular need to share confidential files among employees, you might be using a mapped network drive.
Operating a full-fledged network is not cheap. To keep the overall costs minimal, it is essential that you maintain a check on the files present in your mapped network drives. If there are any duplicates present, you should get rid of them as soon as possible. Not only will this save storage space but it will also make your work life easier by improving the performance of your system. Tools like PictureEcho make it quite easy to scan your mapped network drives and clean up all duplicate photos.
How to Use PictureEcho
Using PictureEcho is a piece of cake. Within a few minutes, you can not only scan your Network drive but also get results and act accordingly. To begin with, head to PictureEcho’s website, download the setup file and install it. Once you are done with the installation, launch the software.
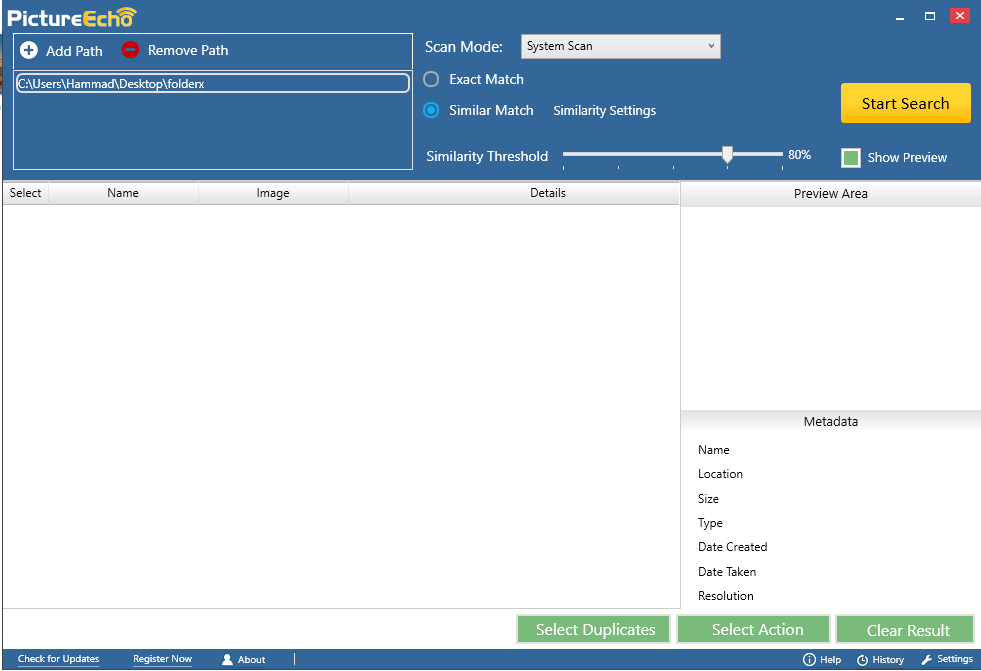
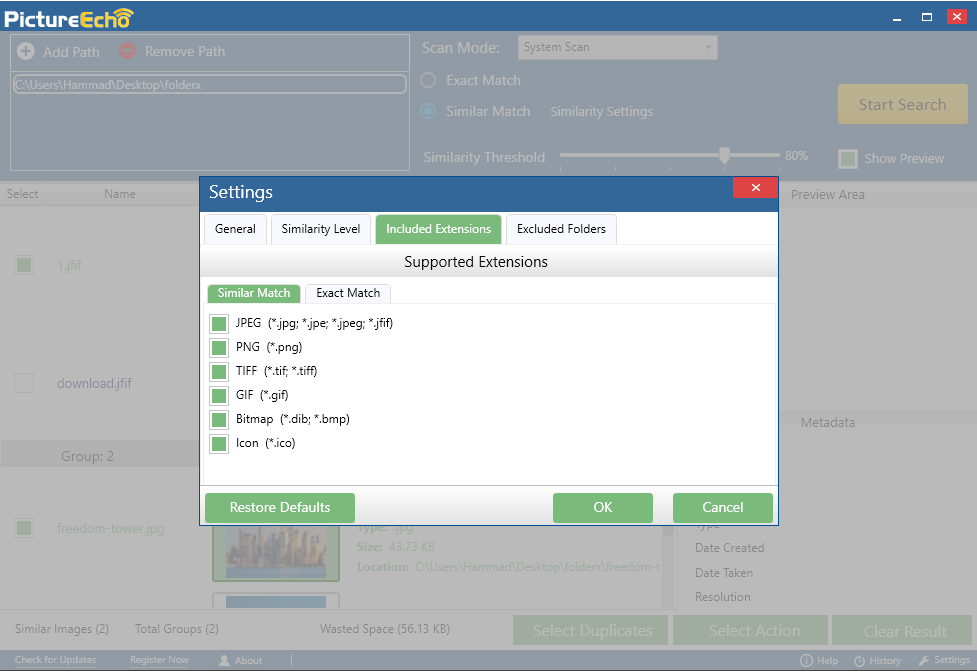
Now click on Add Path and navigate to the location of your mapped network drive. You can either look for exact matches or similar matches. The Included Extensions tab in the Settings section helps you decide which file types you want to include in your search. PictureEcho is compatible with various photo file types including JPEG (JPG, JPE, JPEG, JFIF), PNG, TIF/TIFF, GIF, Bitmap and Icon.
You can also change the Similarity Threshold using the slider present in the upper-half of the software interface. Once you are done with the settings, start the scan by hitting the Start Search button. The scan will be over pretty soon and you will see a notification regarding the number of duplicates found and the space they were occupying. No matter whether you had 5 duplicates or 5000, PictureEcho’s intelligent algorithms will hunt them all.

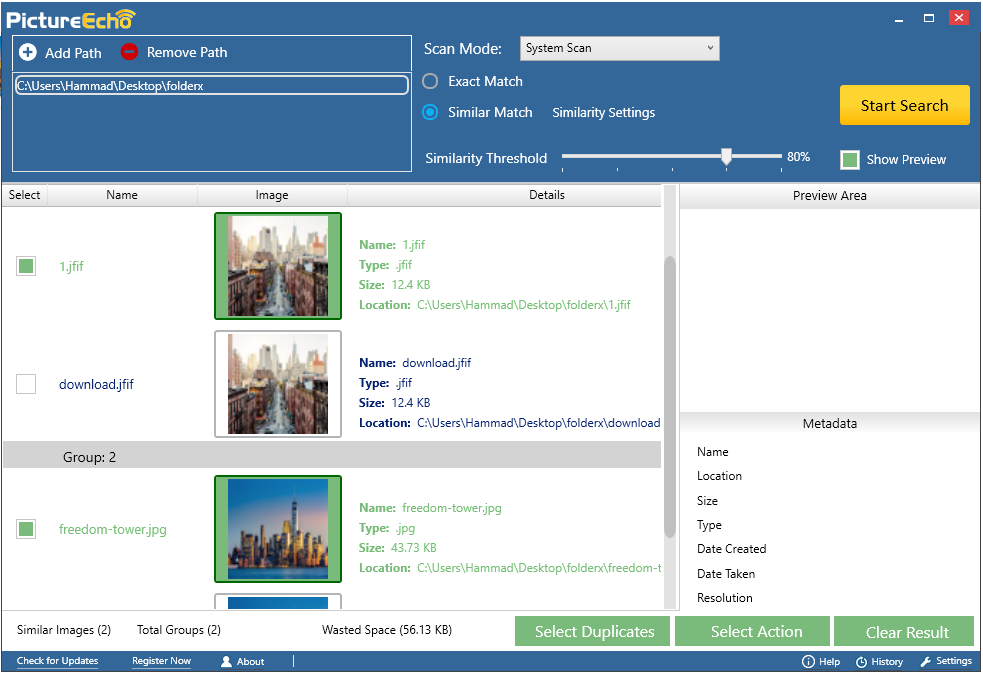
Click on OK so you can now view the list of all the duplicate photos that have been detected. You will see duplicates (name and picture preview both) as groups. Here, you can either select the duplicates manually or by applying a rule through the Select Duplicates option. If you choose the automatic method, you can select duplicates based on various features such as resolution (highest/ lowest), date of creation (oldest/ newest), file size (largest/ smallest) and by photo location.
Once you have selected the duplicates that you do not wish to keep, you can either get rid of them by permanently deleting them or you can relocate them to a different location. Click the Select Action button and choose your preferred option.
That’s pretty much it! By following these simple steps, you can find and purge all the duplicate pictures accumulated in your network drive.
Compatibility
For now, PictureEcho is compatible with Windows 10, Windows 8/8.1, and Windows 7. Unfortunately, macOS or Linux users will have to wait until the developers scale up the tool. A neat fact about PictureEcho is that it only requires 20 MB of your hard disk’s free space.
Depending on how many photos you are scanning, PictureEcho can help you recover tons of storage space. Once you have cleaned your mapped hard drive, you will automatically observe an enhanced system speed and performance. On top of that, you will no longer have to waste hours trying to find the right file amidst all the junk files. Doesn’t that sound cool?

