Although nowadays Cloud drives are often used to move files around, no medium is still able to replace the role of USB drives. A USB drive is a small device with a storage unit that holds digital data and comes in different sizes and shapes. It can be plugged into any computer device and copy data to move around. The frequently used files on USB drives are photos, as many modern digital cameras have been compatible with the USB standard for many years now. Therefore, it’s very convenient to use a small USB drive to carry photos without worrying about internet connectivity. In addition, many individuals still don’t have a reliable, fast Internet connection to make the most of cloud storage. Therefore, USB is still the most reliable solution to move files around without any hassle. This article teaches how to organise photos on an external USB drive. So, it would be easy to locate files with ease.
Product Spotlight: Use PictureEcho to find and delete duplicate & similar images. Get it NOW!
Solution 1: Use the Folder System
The primary way of organising files in any computer system is using its inbuilt folder system. In a folder system, folders are used to keep the files contained to locate them with ease. Computers, digital cameras, DSLRS and mobile phones have their own folder system. They are compatible with each other depending on the file system type; hence, it’s ideal for organising photos. This segment demonstrates how to effectively use the folder system on a Windows PC to keep the photos organised. For maximum compatibility, it’s recommended to keep the USB drive formatted in FAT32 format. So it works across many devices.
How to Create a Folder
A folder can be created on the USB drive by selecting the Folder item in the New sub-menu. Right-click from the mouse anywhere on the blank space to open this menu.

Methodology to be Used
Photos can be categorised by the event name, for instance, Weddings, Graduations etc. With that in mind, each folder is given the event’s name, and then photos belonging to each event are copied to the appropriate folder.

How to Customise Folders
Folders can be customised to improve the organisation even further. Some well-known inbuilt methods to be used are folder optimisation, colour code the folders, and changing the folder icon to give it a better representation than the generic yellow file cover icon.
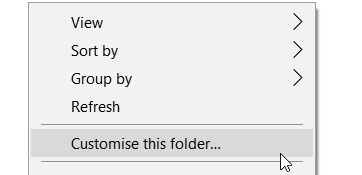
Right-click anywhere on the plain space, and select Customise this folder from the menu.
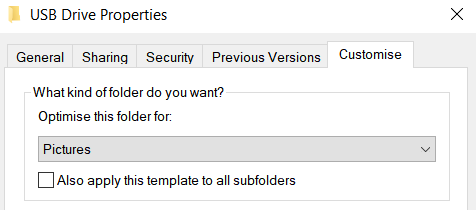
Switch to Customise tab and select Pictures from optimise this folder for drop down menu to make the folder optimised for storing photos. According to anecdotal evidence, optimising a folder for pictures improves the performance of the Photos app when the images are being viewed.
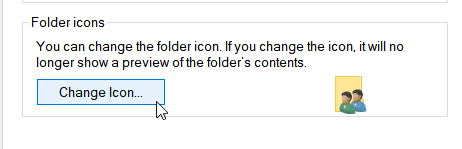
The folder icon can be changed to pretty things up and give it a better representation. It also helps to draw attention to the folder with little help. Windows has several default icons that can be selected with the Change Icon button. More icons can be downloaded from the Internet for free of charge.
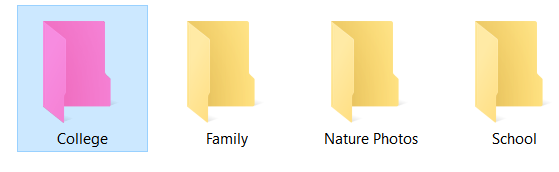
By default, Windows doesn’t support colour-coding its folders, and thus this guide recommends an external software, like Folder Painter. When the software is installed on the computer, it adds a menu item to the context menu of the File Explorer. The sub-menu has several folders in different colours. Selecting an item from the submenu colour-codes the folder with its appropriate colour but hides its content on the flip side.

Solution 2: Use Metadata
Whenever a photo is taken from any digital device like a digital camera, DSLR, and mobile, along with the photo, the metadata of the photo is recorded as well. The metadata is called EXIF, aka exchangeable image file format. EXIF metadata stores in the photo itself; hence, whenever a photo is moved around, the metadata goes along. This metadata can be used to organise photos, especially on the PC as Windows supports it. This segment explains how to append metadata to photos and how they can be used to find the right photo with ease with File Explorer.
Select the photos to add the metadata. Multiple images can be selected with CTRL + Right Mouse button.

Right-click on the selected photos, and select Properties, then switch to the Details tab. Please go through the EXIF metadata in the Details tab and add common values for all the selected photos. Multiple metadata values can be added with a semicolon separator. This tutorial only focuses on tags metadata, but other metadata can be added by following the same steps. Beware because anyone can see this metadata. Therefore, it’s essential to strip off Personally Identifiable Information (PII) before sharing them with other people; for instance, geolocation recorded in the photo helps stalkers identify the user’s whereabouts. Some of the Metadata might not be visible in certain apps and devices; for instance, the tags metadata don’t show in the photo app of Android, but it does show the geolocation.

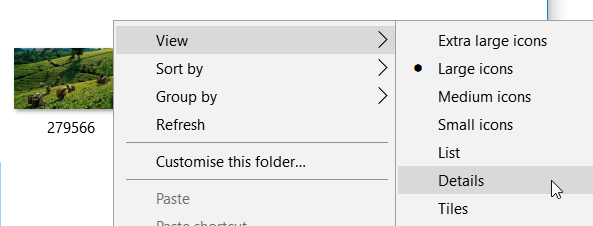
When it requires finding the relevant photos on Windows, right-click anywhere on the empty space of the folder and select View, then Details. It causes all the Metadata of the photos to be visible in the File Explorer.
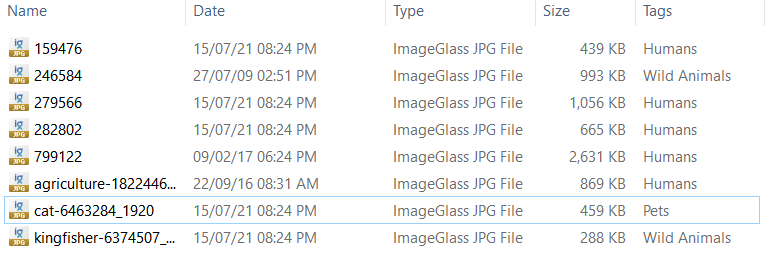
The tags added to the photos appear in a separate column, as seen in the following screenshot. Clicking on the tag header lets the images get sorted in ascending or descending order.
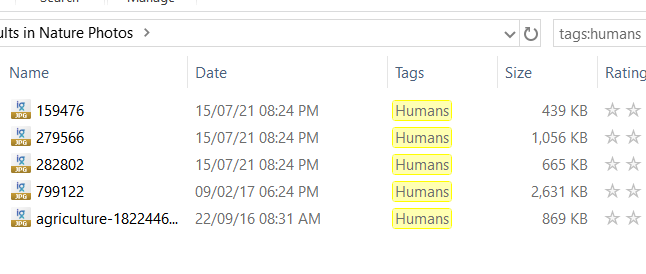
File Explorer has a search bar that supports search by Metadata. Type the metadata key and its value to search for the photos with the given Metadata. If found, they will list out in the search result as seen in the following screenshot. This metadata appears in File Explorer whenever the external USB drive is plugged into a Windows PC.
Since Metadata saves in the photo, they can be viewed from any other device as well. If the geolocation is appropriately recorded, the Google Photo app automatically organises the photos by the location where they were taken without any user intervention. However, it requires an Internet connection to fetch the location data from the Internet. Lastly, even though the photos are organised on an external USB Drive, the benefits can be experienced across many devices because of EXIF metadata.

