GIMP is a free and open-source graphics editor and a converter, and is similar to Photoshop in terms of functionality. Unlike Photoshop, GIMP is completely free of charge; hence anyone can download it immediately without any restrictions and get started on their computer.
GIMP Photos is the name given to pictures that are created using the application. It has the ability to save edited pictures into various commonly known image file formats, so third-party image viewers can open them with ease. This guide demonstrates how to identify duplicate images when using them with GIMP.
Solutions
GIMP uses the .XCF file format, which is not a common image format, but is a document format for storing images and their modification details made within the application. This means that even though it’s possible to identify identical XCF files, it isn’t possible to identify visually similar GIMP images. However, it’s possible to identify visually similar photos before using them in GIMP, so that you can save your time as well as all the effort when editing the images.
Solution 1: Spot Identical Files
Identical files are the exact replica of a file. They are also known as duplicate files. These files are quite common, and are one of the major reasons for occupying an enormous amount of space in the hard drive. This guide uses Clone Files Checker for removing exact duplicate files with ease and accuracy.
- Download Clone Files Checker by navigating to https://www.clonefileschecker.com/ on the browser.
- After downloading its setup, install it by executing the setup file.
- Launch CFC through its desktop shortcut and click Settings.
- Click the Filter Settings tab and add .XCF file format to the Images section as seen in the following screenshot. Click OK to close this window.
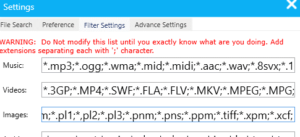
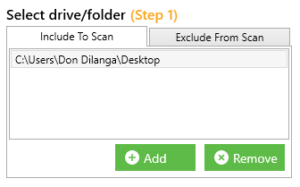
Adding up .XCF in the Image types directory - In Step 1, add the folder/ folders you wish to scan for duplicate GIMP photos.
- In the next step, select the radio boxes for Custom | Images and then hit Start Search to launch the scan.
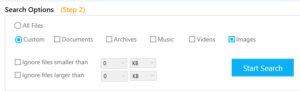
Applying settings for an image scan - The scan result will appear in the Clone Files Checker user interface momentarily. It provides comprehensive results for the scan and gives a brief insight into what has gone wrong and where.
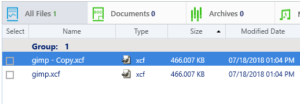
- You can choose which kind of duplicate GIMP photos you want to retain by clicking the Select Duplicates button and then clicking the option of your choice.
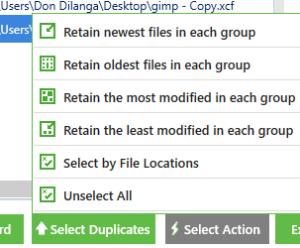
Choose to retain the duplicates of your liking - The last step involves clicking the Select Action button and choosing between permanent deletion and moving the duplicates to a different location.
Solution 2: Identify Visually Similar Images
This method is more of a secondary or indirect method. We say this because it relies upon PictureEcho to do the task. As its name implies, this software deals with scanning photos for weeding out duplicate as well as similar images. However, it currently doesn’t support the .XCF format. Hence the user must scan the photos before processing them in GIMP. This means that PictureEcho gets to deal with the photos in the original format they are in, and can get rid of all duplicates and import the genuine image into GIMP. Here is how it happens.
- Download PictureEcho from https://www.pictureecho.com/download/
- Execute the setup file to install it.
- Launch PictureEcho, and click Add Path to navigate to the folder where all the images are located. Select the folder and click Proceed to add it for the duplicate scan.

- Select Similar Match, and also select the checkbox for Show preview. Finally, hit the Start Search button to initiate the scan.
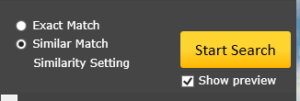
Opting for Similar Image Scan as well as Image Previews - The scan results will appear in the main panel in a while.
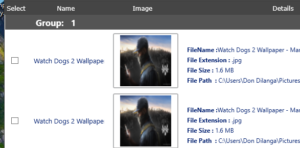
Scan Results - Click the Select Duplicates button and select from one of the available options to choose which kind of photos will be retained (from each duplicate group). As you select the option of your choice, you will notice that the selected images will be highlighted in green.
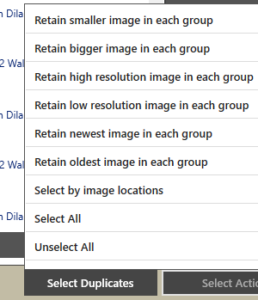
Choose which kind of image you want to retain - Finally hit the Select Action button and choose between permanently deleting the duplicate photos or backing them to a folder of your choice.
- Launch GIMP, and import the pictures to be processed.

