You must have definitely seen people doing amazing things with their photos. We’ve put together a few tips & tricks in this blog post to help you change the look and feel of your photos without any technical proficiency required at all.
The Photos app in Windows 10 may not be as powerful as Adobe Photoshop, but it’s extremely easy to use and friendly for beginners and those outside the creative industry. It does a lot more than merely displaying and slide showing your photos. It features a whole set of basic image editing controls to alter your images in a skillful manner without damaging the original photo file.
Let’s take a look at some super cool features you can use with the Photos app we bet you didn’t know about before.
Tip # 1: Fix Red Eyes & Distortions
The problem of red eyes is not uncommon in photography. A brighter light source or a camera flash can distort an otherwise excellent photograph. Fix red eyes to avoid regrets and keep the cherished moments in your life alive forever.
- Right-click an image that you want to edit.
- Select Open with | Photos.
- In the Photos app, click on Get creative with this photo and select Edit.
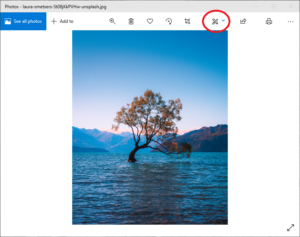
- Now select the Adjustments tab.
- Look for the Red eye button on the right-hand side panel. Click it and you will notice the mouse pointer turn into a bluish circle.
- Move the pointer to the spot where you want to remove Red eyes and click the exact spot.
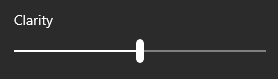
- Next, move the Clarity slider to the right/ left to adjust your picture’s quality.
- Finally, save the edited version of your photo by clicking the Save a copy button. Specify a name for your new file.
Tip # 2: Experiment With Different Color Shades
An image filter helps you change the shades and colors of the image pixels. It automatically adjusts the brightness and contrast depending on the theme of the image. You can choose different picture filters from a choice of 15 options.
- Open an image in the Photos app for editing.
- Select the Filters tab.
- Choose your preferred photo filter from the options given on the right-hand side panel. For example Sauna, Neo, Slate, Rouge, Sun Screen, Lacrus, and so on.
In this tutorial, we’ve selected the Sunscreen filter. Your image should look like this:

Applying the Sunscreen filter - Save the changes.
Note: To revert the original photo filter, click on Original.
Tip # 3: Crop Unneeded/ Outer Portion
Cropping will help you fine-tune the outer areas and do away with any unneeded portions of your photo.
You can use the crop tool to manipulate an image and change the Aspect ratio. You can turn a portrait image into a square, a square graphics into a vertical image, and vice versa. The 1:1 Aspect ratio indicates that the height and width of an image are the same.
There are over a dozen Aspect ratios for you to choose from. Which ones should you choose?
It all depends on your requirements.
The Aspect ratio for different devices vary. Here are our recommendations:
- Smartphones: 16:9
- Standard television sets: 4:3
- High definition television sets (HDTVs): 16:9
- Projectors: 4:3
- iPads: 4:3
- Tablets: 16:10 or 4:3
You can set the new Aspect ratio as under:
- Open your photo in the Photos app for editing.
- Click on the Crop & rotate tab.
- Click the Aspect ratio drop-down box on the right-hand side panel.
- Now choose your preferred Aspect ratio. For example Square, Widescreen – 16.9, 4:3, 7:5 or 10:8.

Choose your preferred Aspect ratio - Click Save/ Save a copy.
Note: To revert to the original Aspect ratio, select the Original option.
Tip # 4: Use Optimum Image Resolution
This tip is very helpful if you are planning to publish your image on social media platforms such as Instagram, Facebook, Twitter, WhatsApp, Pinterest, SnapChat, etc. Choosing the right image size and resolution is important to improve the user’s engagement rate.
Different social media platforms have different size recommendations.
- Instagram: 1080*1350 pixels
- Facebook: 1200*630 pixels
- Twitter: 1024*512 pixels
- WhatsApp: 800*800 pixels
- Pinterest: 735*1102 pixels
- SnapChat: 750*1334 pixels
Tip # 5: Optimize the Image for Publishing Online
Image optimization reduces the size of an image by compressing its content. Before uploading your photos on social media, FTP, or a website, be sure to turn them into smaller images with less size. You can easily share smaller versions of your original images with your friends and family.
- Visit Image Optimizer’s site, a free online image optimization service.
- Click the Choose File button, locate the image file you wish to optimize and double-click it to upload it.

Selecting the options of your choice - Use the Quality drop-down box to set a quality parameter for the end product. For example Small file size.
- Click Optimize Now to initiate the image optimization.
- When the image optimization is over, click the Download to your computer button to save the image to your computer.

Image optimized successfully
As can be seen from the above figure, the original image size was 2667 KB and the optimized, reduced image size is only 521 KB, i.e. a reduction of a whopping 19.5%!

