Adobe Illustrator is a vector graphics editor, which enables users to create logos, mascots, icons, and infographics arts with ease. It is one of those applications which are a part of the Adobe Creative Cloud Suite. Each application included in this software suits has been developed for a specific purpose and requires a specific set of skills to operate them.
Illustrator is widely used as a vector graphics editor due to its flexibility, and availability of a wide variety of tools. This article demonstrates 10 tools available in Adobe Illustrator, and how each one of them can be put to good use.
Magic Wand Tool
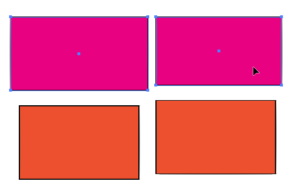
The Magic Wand Tool has been a key part of Illustrator, as well as Photoshop for years. The tool is located at the top of the toolbar as it is frequently used by designers. The purpose of this tool is to help designers select similar color tones at once without having to select individual color tones one after another. This is quite useful in photography to retouch the photo with relative ease. In the following example, when one pink color box is selected with the Magic Wand tool, the other one is also selected, and thus effects can be applied to both of them at once.
Lasso Tool
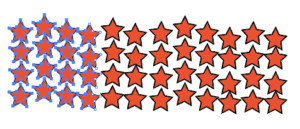
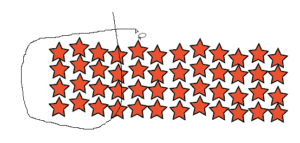
The Lasso Tool is another important tool, which is once again found in Illustrator, and Photoshop. It helps the user select multiple objects, points, coroners or vertexes in a vector art at once. As seen in the following screenshots, the covered area is easily selected with a line, and thus it saves the time of the user in selecting multiple objects at once. This might not be very useful in the following scenario, but if there are a big number of objects, and if the user needs to apply the same effect to a significant number of them, the Lasso tool comes in handy.
Pen Tool
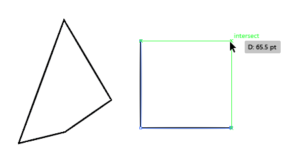
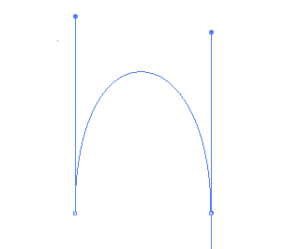
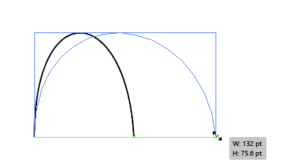
The Pen Tool is another widely used tool in Illustrator, and facilities the user in creating shapes and lines. The following screenshots explain it’s usability, with the first one being used to create a simple enclosed shape. This can be done by clicking on any spot and then dragging the line to form the desired shape. The 2nd diagram demonstrates how it’s possible to create circles, curved shapes etc. All the user needs to do is intelligently draw the concerning shape, and later on, the diameter of the curve can be adjusted to form a circle.
Paint Brush Tool
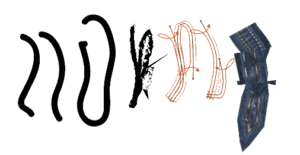
The Paint Brush Tool, as its name implies, helps the designer to brush up the canvas with a digital brush. This is compatible with both the traditional mouse, as well as the drawing tablet pens. By default, this tool uses the standard brush stroke, but they can be altered via the properties as seen in the 2nd screenshot below. The Paint Brush tool is useful in applying the paint to art design, and for other complex color blending pictures as well.
Erase Tool
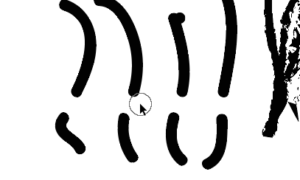
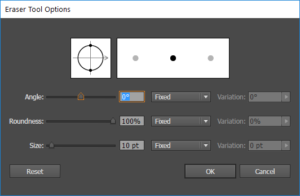
The Erase Tool lets the user erase objects drawn on the canvas. It is quite useful in removing unwanted areas, shapes, lines from the drawing. By default, this tool has a small diameter circle, but this can be changed with ease by double-clicking on the Erase tool.
Free Transfer Tool
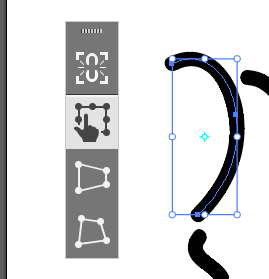
The Free Transfer Tool is quite useful when it comes to adjusting the shapes with ease. It features three subcategories, Free Transform, Perspective Distort & Free Distort. Free Transform makes causes 6 dots to appear around the shape. Changing their position makes that side of the shape to move along with it. Perspective Distort and Free Distort both allow the user to drag the shape from a location of their choice (in different ways) without moving it as a whole. The only difference between Perspective Distort and Free Distort is that the former makes the other side of the same axis to move out of the shape when this side is dragged out of the shape, and the latter allows moving the dots as per the designer’s requirement.
Eyedropper Tool
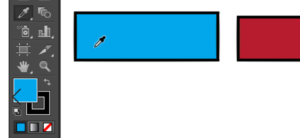
The Eyedropper Tool helps to pick up the color of the canvas, just like it’s everyday life namesake. Apart from picking up the color, it also updates the color plate with the picked-up color. This is quite useful in both finding the color of a particular object when the color is unknown, or when the same color has to be applied on a different object without changing the color of the color plate manually.
Measure Tool
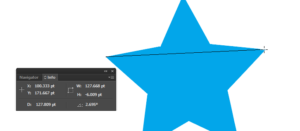
The Measure Tool is literally a tape which helps take measurements of objects on the canvas. It depicts the units in points in a small box under the info tab. The W represents the width of the object, the H means the height, the D stands for depth whereas the triangle represents the angle. Even though by default the units are in points, it can be changed to picas, inches, millimeters, centimeters, and pixels from Edit | Preferences | Units.
Zoom Tool
As its name implies, the Zoom Tool allows to zoom in and out of the canvas. By default, the zoom tool only zooms into the canvas when the right mouse button as soon as the Zoom icon has appeared on the screen. However, by pressing, and holding the Alt key when the Zoom tool is selected, it is possible to zoom out of the canvas with ease. The user can zoom to a max of 64000%, and to a min of 3.13%! Double-clicking the Zoom icon resets all the zooms reverts the canvas to appear at its original size (100%).
Rotate Tool
The Rotate Tool is also available in both Illustrator and Photoshop. Its purpose is to allow the object to be rotated on a given center. Before rotating, the object should be selected and its center marked. Next, the user can drag the object and rotate it freely as seen in the following screenshots. For the sake of maintaining a high degree of accuracy, the user can also enter in the rotational value by double-clicking on the rotate tool.


