Everyone loves taking photos every once in a while. Over time, the files stored on your personal computer may start to look almost identical. This is because the titles generated by the photo-taking device may vary based on the type of device but are generally similar across the board. In such cases, individually renaming the files can be a tedious task. So, if you wish to rename photos in Windows 11 and Mac, having a few useful tips up your sleeve can make the process easier. Let’s discuss.
Batch Renaming Using Windows 11 File Explorer
The first method involves using File Explorer in Windows 11. The best thing about this tool is that you don’t need to download a third-party application just to rename a batch of files.
- Launch File Explorer and navigate to the folder or location containing the files you intend to rename.
- Select all files or individual files as needed.
- Click the Rename option in the top bar menu or right-click and select Rename.
- While renaming, only one text bar will open, but the change will apply to all the selected files.
- Enter a new title, and Windows will rename all the files accordingly.
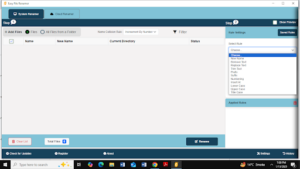
Batch Renaming in Windows 11 Using Easy File Renamer
Another excellent way to rename batches of files in Windows 11 is by using a renaming tool like Easy File Renamer. It features an easy-to-use interface with several renaming options. Plus, it can also rename files stored in cloud storage, including music files.
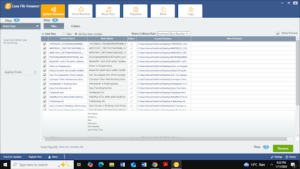
- Upload the files individually or import all files from a folder.
- Select the files individually or keep the default all checked option.
- Click the Select Rule option in the left menu and choose the renaming rule.
- Easy File Renamer allows you to apply multiple renaming rules at the same time.
- Once everything is set, click the Rename button in the bottom right corner, and the tool will rename the files instantly.
Batch Renaming Multiple Files on Mac
The process of renaming multiple files or a batch of files on Mac is quite different from Windows.
- Open Finder and select the files you wish to rename.
- You can either drag the cursor to select multiple files or go to the Menu, click Edit, and select Select All.
- Right-click the selected files and choose the Rename option.
- Enter the new title in the dialog box and click Rename.
The best part about batch renaming using Finder in Mac is that it provides multiple renaming options, allowing you to customize how you rename files.
- Replace Text: Replace a specific text in the filenames with your desired text.
- Enter the text to find in the Find box and type the replacement text in the Replace With box.
- Add Text: Add text to the original filename, making it easier for photographers and professionals to organize their photos in ascending or descending order.
- Format Option: Erases the entire filename and assigns a completely new name.
- This option gives full control over Name Format, offering three settings: Where, Name Format, and Custom Format.
- Format is arguably the best option for renaming batch files in Mac, as it provides complete control over the new file names.
Batch Renaming Multiple Files on Mac Using Easy File Renamer
Using Easy File Renamer to batch rename files on Mac is quite similar to Windows.
- Download and install Easy File Renamer.
- Launch the software and upload the files you wish to rename.
- Select the renaming rule and click the Rename button.
- If you have additional files stored in Cloud Storage or music files that need renaming, Easy File Renamer can handle them as well.
With just a few clicks, you can easily rename multiple files—whether they’re stored on your computer or in the cloud.