Lightroom Duplicate Images Finder
Find and remove duplicate photos in Adobe Lightroom on Windows and Mac
Fix Duplicate Images in Adobe Lightroom
Perform a Swift Cleanup with PictureEcho
Lightroom is an Adobe family software used for image organization and manipulation. It is a great choice for aspiring photographers and those into heavy graphics jobs.
Whether you are a beginner, seasonal photographer or a skilled graphics designer, Adobe Lightroom is easy to use and requires little or no technical experience. It provides a dedicated set of tools to batch import, organize, manage and edit digital photographs. It allows you to specify keywords for each photo so that you can search for photos in no time.
One of the neat features of Lightroom is the ability to undo changes at any point in time, even after several days or months of making changes to your images. This unlimited undo feature uses the Lightroom Catalog which contains a detailed history of all the changes made to each image file.
The slider-based control in Lightroom provides a seamless experience and at the same time helps improve photo quality, adjust brightness, contrast, and so on.
When you open an image in Lightroom, it doesn’t make changes to the original file. Instead, the program imports a copy of that image. This technique is known as non-destructive editing.
Lightroom doesn’t require installation of a separate plugin to view Raw files. It can easily fix distortions and chromatic aberrations caused by the lens in the images. You can even add keywords to your favorite photos to make it easy to search them in a minute.
Ever heard about the Macro feature in Microsoft Office that automates your tasks? Taking a cue from the Macro feature, Lightroom records and memorizes the changes made to the images so that you can batch edit tons of photos in just a few clicks by adjusting contrast, balance, exposure, preset, and so much more. Lightroom makes it easier to print the photos without much hassle. You only have to select a paper layout, and Lightroom will do the rest of the job automatically.
Lightroom supports a wide variety of image types when it comes to exporting the photos to either a CD or DVD or even publishing them on the Internet.
If you‘re going for a vacation and accessing Lightroom from some other computer, your file data will be stored in a catalog which can be merged back into the home computer. The in-house functionality allows you to even add watermarks to your photos. You can also choose an existing image file as a watermark for your photos.
If you have the GPS feature enabled in your smartphone, Lightroom will automatically mark your photos by their locations to better organize your image library. You may even group the photos by different parameters such as date of creation, camera type, and author. It also comprises of an excellent feature to convert your images into any file type without having to rely on third-party conversion utilities.
Lightroom beats Photoshop when it comes to the disk space required and price. While a single license of Adobe Photoshop alone costs around $699, Lightroom is offered for as low as $149. Lightroom takes only 100 MB of your disk space, contrary to Photoshop that occupies a total of 5.2 GB of storage space in addition to 2.4 GB for optional web content.
Lightroom contains a powerful file organization functionality which ensures automatic backups to preserve your data against system crashes, boot failure, and virus infections.
Facing Problem of Lightroom Duplication? Here’s How to Get Rid of It
A duplicate file is an identical copy of a photo that may be stored in the same directory that contains the original file or an altogether different directory, another partition or even a different storage medium such as the cloud, external Hard Drive or a USB stick.
Almost every computer user creates duplicate files intentionally or otherwise. For instance, if you are regularly transferring data from your phone to your PC, there is a chance of copying the same content over and again in different directories.
Such duplicates occupy a significant portion of your hard disk and impact the overall computer performance, and even cause it to become unstable. It may become a lot harder to keep track of your massive data and the files on which you have worked recently.
The following lines provide some of the most popular approaches to find duplicate Lightroom content.
Lightroom Files with Identical Name
If two or more files contain the same filename, there is a possibility that they are duplicates indeed. The easiest way to gather the list of files with identical names is to use the Windows Search functionality.
Although Windows Search is not specifically designed for this task, it is powerful enough to sort files by their names to individually identify duplicates. Here’s how:
- Click the File Explorer icon on the taskbar.
- Open up the partition that contains the suspected duplicate files.
- Type a filename in the Search box on the top right corner of your screen.
- Wait for a moment and Windows will compile a list of all the files that match the specified name.
- Click the View tab in the Ribbon interface.
- Now click the Sort By option to arrange files in the ascending order (alphabetically).
- Now you will be able to spot all the files with identical names grouped next to each other. Select all the files you want to remove and hit the Shift + Delete keys combination to purge them.
Lightroom Files with Identical Size
Now we will see how we can group the duplicate files (in size), and then do the needful. This is a very easy job and can be accomplished within minutes.
Be advised that it is not necessary that all files with the same file size are duplicates. For instance: Spreadsheet A may contain the list of 100 clients and SpreadSheet B may contain a list of 150 clients, including those already mentioned in the Spreadsheet A.
The steps to sort files by their size are similar to those given above.
- Open up the location which contains all the suspect duplicate files.
- Click on View, followed by Sort By.
- Select the Size option.
- Again, click on the Sort By drop-down box, and then select the Ascending option.
Lightroom Files with Identical Content
The main problem with both of the approaches described above is the lack of accuracy. Focusing on the filename/ filesize does not guarantee accurate results, and these methods also require a great amount of effort on your part.
If you’ve got a huge amount of data, scanning it for duplicates (by name/size) is humanly impossible. Thanks to Information Technology, it has become extremely easy to scan throughout the content with just a few clicks.
- Make sure that Lightroom is closed. If it is already running, be sure to close it.
- Download PictureEcho from it's official website.
- Install and run the application.
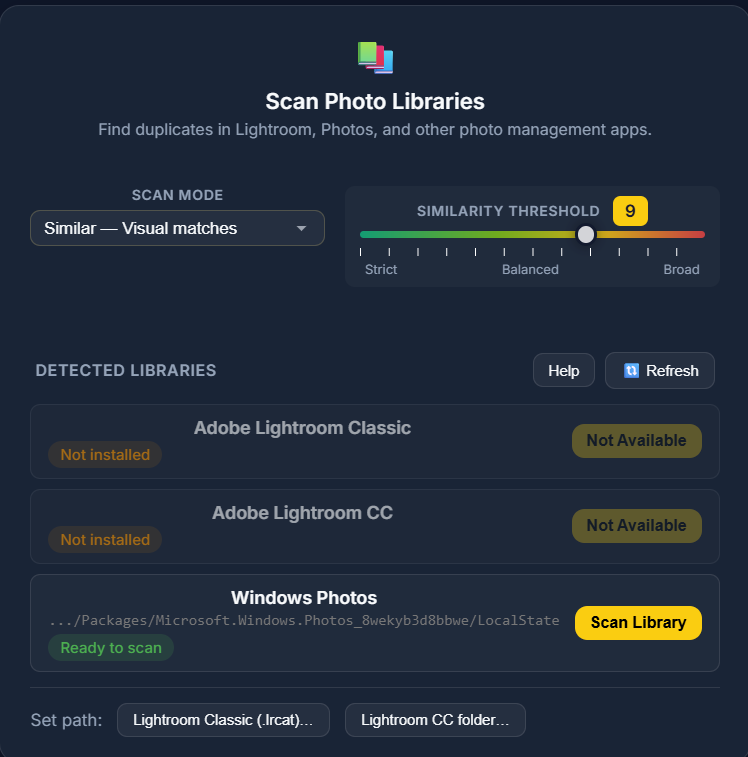
- Click the Adobe Lightroom tab.
- Choose a similarity criterion between Exact Match and Similar Match.
- Exact Match: This will scan for images that are identical to each other.
- Similar Match: This will scan for images that resemble each other a lot, but can’t be termed as duplicates.
- Now click Start Search to launch the scan.
- PictureEcho will now scan the Adobe Lightroom photo library and show the thumbnails of all the matching duplicates grouped together.
- Now you have to select the duplicates. You can either select them individually or use the Select Duplicates button to bulk select them with a single click. The bulk selection feature offers several options such as:
- Retain smaller image in each group: Use this option to select all images except the smallest one for further action
- Retain bigger image in each group: This file size filter allows you to select all images except the largest one. This is especially helpful if you want to delete large sized files and free up a significant portion of your disk space.
- Retain low resolution image in each group: With this option, PictureEcho selects all images (except the one with the lowest resolution).
- Retain high resolution image in each group: Use this option to select all images (except the one with the highest resolution).
- Retain newest image in each group: This option will automatically select all the images except the newest one (based on their date of modification).
- Retain oldest image in each group: This option selects all the versions of files in each group except the oldest one.
- Select by image locations: This option has its own significance. It allows users to mark and unmark (deselect) files by their directory. Upon clicking this option, you’d be prompted to specify directories of your choice.
- Finally, click on Select Action and choose whether to move your files to the Recycle Bin or to a folder of your choice. If you're busy and have no time to evaluate each file yourself, Move to the Folder option will be your best bet.
PictureEcho isn’t about the Lightroom scan only. You can even choose to scan your entire hard drive, removable media storages such as USB stick, memory card, and external hard disk, for duplicates. In case you want to search your digital camera for duplicate photographs, just connect it to the PC and select the appropriate drive icon to scan for duplicates.
Bonus Tip: Improve Lightroom Performance By Regularly Optimizing Your catalog File
Lightroom catalog is a file that contains information about each picture file stored on your hard drive, along with other necessary information about the changes made to each file which are useful to facilitate unlimited undo for user actions.
Just like a corrupt catalog file can lead to various problems including Lightroom crashes, duplicate entries of your photos can lead to a huge mess. This, in turn, affects your computer performance and not to mention, your productivity.
The solution lies in the fact that you will need to regularly optimize the catalog file. The lower the catalog file size, the higher the performance is. You can optimize the Lightroom catalog this way:
- Open Adobe Lightroom.
- Click on the File menu, and select Optimize catalog.
- In the new dialogue, click on the Optimize button to confirm.
- The process may take some time depending on the size of your files.
- Finally click on OK after the optimization process has been successfully completed.